
Make a Mini-Greenhouse

Some materials are simply too valuable to throw away. In the case of my father, who is a loveable but well-established hoarder, all materials fall into that category. I spent countless summers pulling bits of wood or rusted metal out of a shed while he made a case for why each rotten weatherboard or rusted doorknob would come in handy later. It is worth mentioned that the very shed in question was assembled from such salvaged items. While there were certainly no right angles in this structure and it seemed to be held together by sheer willpower, it still remains standing today. I think my dad believed that when his building materials reached a critical point, they would spontaneously spawn yet another shanty.
While I mercifully did not inherit my dad’s hoarding habit, we do share an affinity towards the collection of old window frames. As building standards continue to improve, vintage single pane windows are falling out of favour and seem to be finding their way to the curb or into skips. Being a gardener is about resourcefulness. Rather than see that history lost, we can up-cycle windows into a simple, freestanding mini-greenhouse.
The mini-greenhouse is a great small space option for propagating seedlings and avoiding early-season frost damage. It is amazing how much heat can be trapped inside this simple structure, so don’t over do it once the weather starts to warm up. Our design enables you to collapse the structure so that it can be neatly stored away for the next season when it is no longer needed. Like all salvaged projects, discerning eye and a little bit of elbow grease will go a long way to not only making this a functional part of the garden but, more importantly, making it an aesthetic feature that you can be proud of.

1. Salvage a set of old windows, ideally a matching set, but at least of similar size. Hardwood timber and something with minimal rot will make things easier, but it’s not essential.

2. Using a paint scraper knock away the rough patches of paint n the frame and remove any large splinters. Sand back the remaining paint until the frame is even and smooth.

3. Once the frame is cleaned up fill in any imperfects with wood putty, which will stop water from finding its way through the weak spots in your wood and will greatly extend the lifetime of the frame.

4. A coat of clear varnish will help protect the frame and also seal in the rustic, stripped-back look of the wood. Otherwise, lay on a few coats of your favourite paint colour… asparagus green, or I forgot to water my plants brown.

5. Lay the window frames end to end on a flat surface and attach door hinges. To avoid splitting the wood pre-drill holes before screwing the hinges on.
6. The frames should now be able to form a pitched greenhouse structure by closing the angle of the hinge and moving the windows upright.. Expand the frames to your maximum desired size.

7. Set the maximum opening size by securing two lengths of chain to either side of the greenhouse with some screws. Place over the top of your plants, step back and admire your work. You’re going to be a great plant parent.
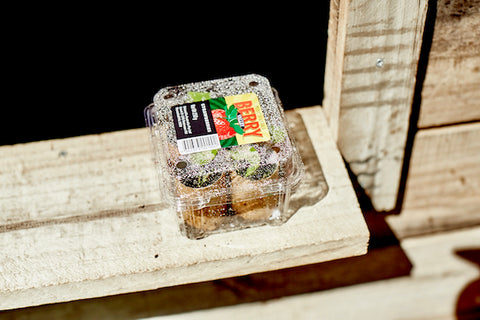
There are so many opportunities for turning trash into garden treasures. There is trash everywhere, begging you to let it realise its potential and help it find a second life. Not only does that spare the immediate dump to landfill, but you also avoid buying something new, and that’s saving resources all round. Here is a quick video of converting a polystyrene box and picture frame glass into incubation heaven. Similarly, strawberry and cherry tomato punnets are another perfect way to get a jumpstart in the garden with a mini-mini-mini-greenhouse;

1. Find a suitable plastic container. You want something that is relatively small, but has air holes in the lid. Strawberry or cherry tomato punnets are perfect for this project. Cut each toilet roll in half so that there are now four little toilet rolls. These now become your propagation pots.

2. Cut a square sheet of newspaper, or any scrap paper that is handy, so that it covers the floor of your greenhouse, and place it at the bottom of the plastic tub. Place the propagation pots into the tub, sitting them on top of the newspaper.

3. Fill each pot with seed raising mix. Using the tip of your finger make a small hole to the required depth for your seed. Plant the seed and gently cover the seeds over with a sprinkle of the seed raising mix.

4. Give each of the pots a little water (enough to moisten the soil) and from this point use a spray bottle to mist your seeds keeping them moist.
5. Place the greenhouse somewhere that gets plenty of sunshine. Kitchen windowsills are usually prime realestate. If the weather is particularly hot, open the lid and let them breathe. Otherwise, they will be happy incubating in the cosy environment you have created.
-
Posted in
infrastructure